
In the following tutorial you will learn how to create a simple
ticket illustration in Adobe Illustrator. In the first steps you will
learn how to set up a simple grid and how to create a pixel perfect
ticket shape. Using this ticket shape you will learn some basic stuff
about working with multiple fills, strokes and effects in the Appearance
panel. Finally, you will learn how to add several pieces of text and
how to easily multiply your ticket illustration.
Tutorial Details
- Program: Adobe Illustrator CS5
- Difficulty: Beginner-Intermediate
- Topics Covered: Basic Tools and Effects, Transform techniques and the Appearance panel
- Estimated Completion Time: 45 minutes
Final Image
As always, this is the final image that we’ll be creating: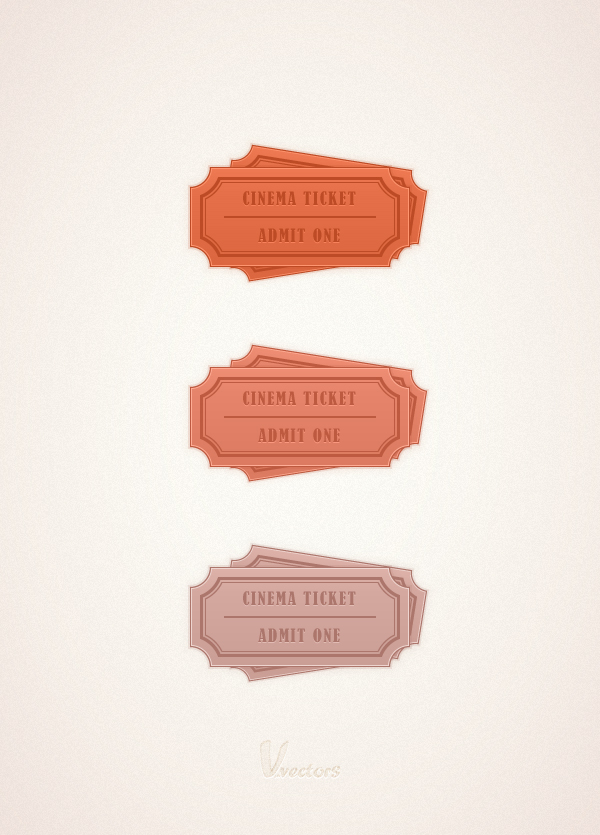
Step 1
Hit Command + N to create a new document. Enter 600 in the width and height boxes then click on the Advanced button. Select RGB, Screen (72ppi) and make sure that the “Align New Objects to Pixel Grid” box is unchecked before your click OK. Enable the Grid (View > Show Grid) and the Snap to Grid (View > Snap to Grid). You’ll need a grid every 5px, so simply go to Edit > Preferences > Guides > Grid, enter 5 in the Gridline every box and 1 in the Subdivisions box. You should also open the Info panel (Window > Info) for a live preview with the size and position of your shapes. Do not forget to set the unit of measurement to pixels from Edit > Preferences > Unit > General. All these options will significantly increase your work speed.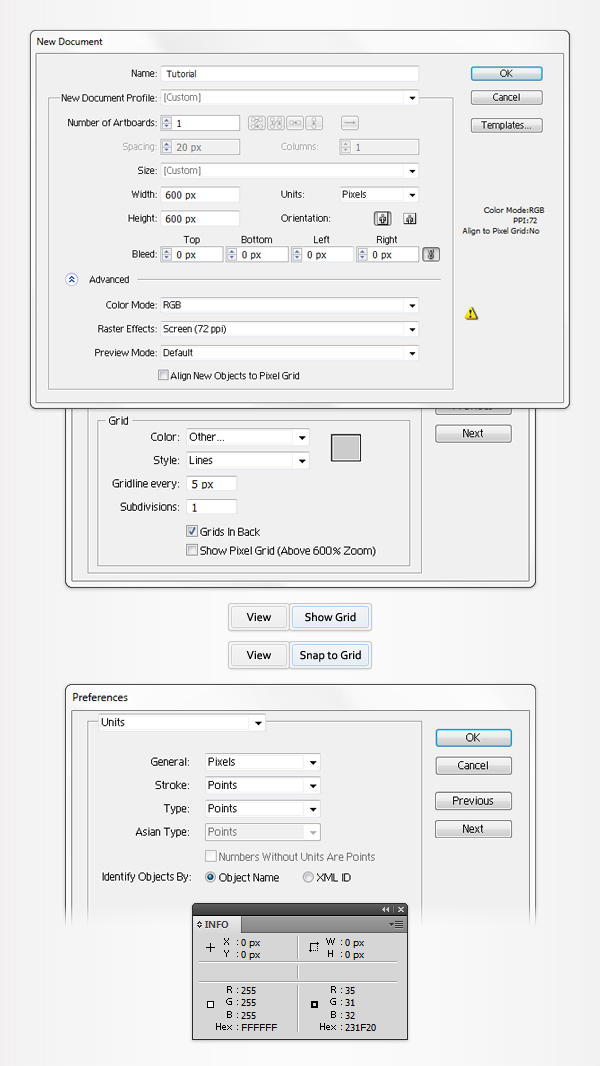
Step 2
Using the Rectangle Tool (M), create a 220 by 100px shape. Fill it with the linear gradient shown in the following image and make sure that you have no color set for the stoke.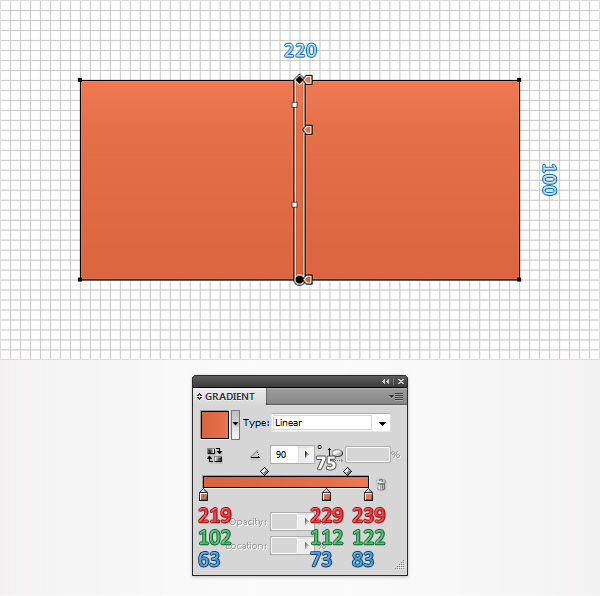
Step 3
Switch to the Ellipse Tool (L) and create a 40px circle. Fill it with white, place it as shown in the first image and go to Effect > Distort & Transform > Transform. Enter the properties shown in the left window (in the following image), click OK and go again to Effect > Distort & Transform > Transform. Enter the properties shown in the right window (in the following image) and click OK.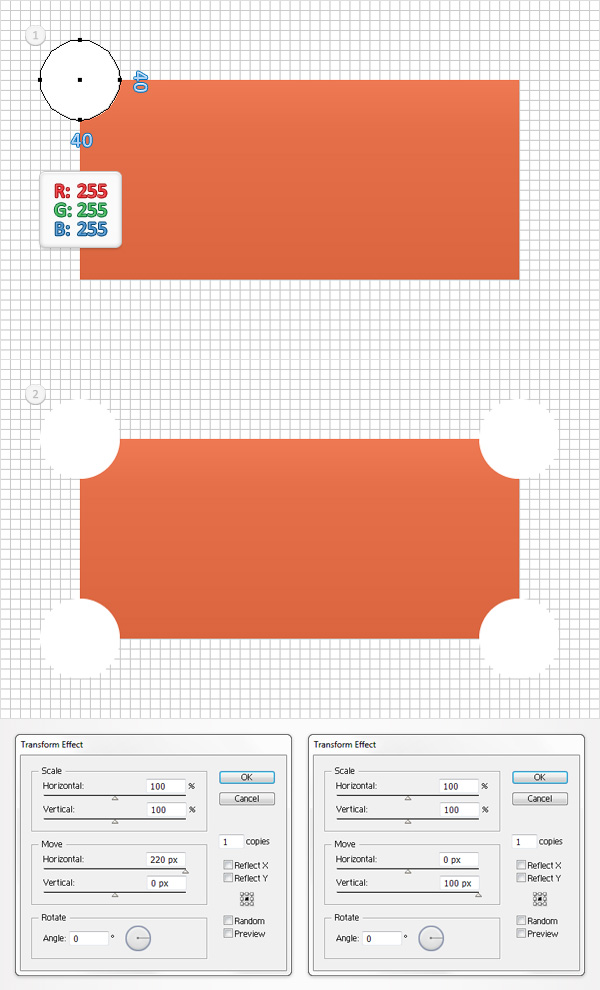
Step 4
Make sure that your white circle is still selected and go to Object > Expand Appearance. Select the resulting group of shapes and hit Control + 8 (or go to Object > Compound Path > Make) to turn it into a simple compound path. Select it along with the rectangle, open the Pathfinder panel (Window > Pathfinder) and click on the Minus Front button. Focus on the Layers panel (Window > Layers), double click on the remaining shape and simply name it “ticket”.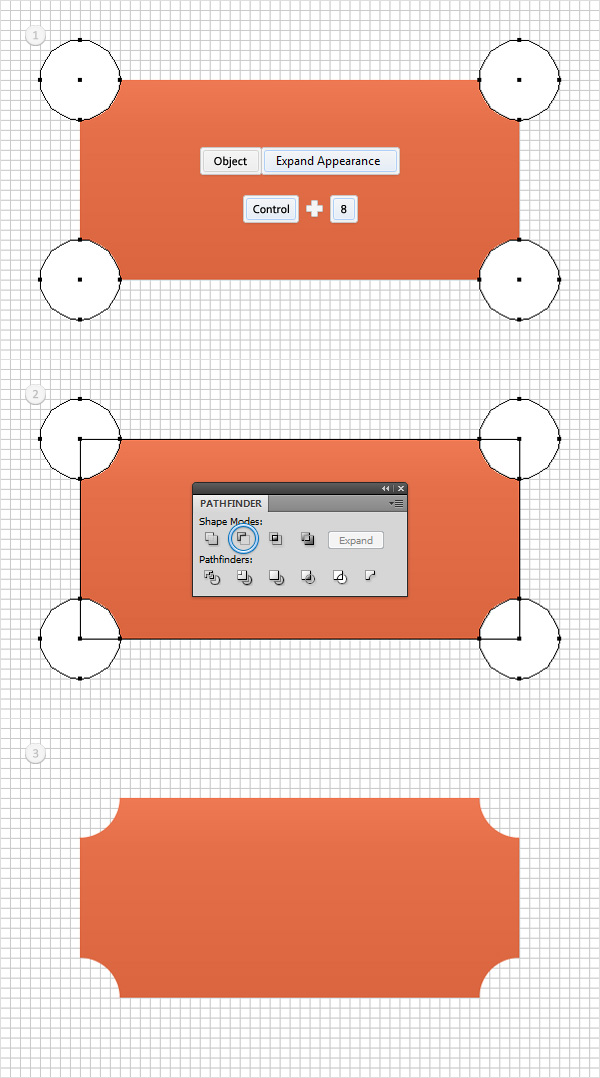
Step 5
Make sure that your “ticket” shape stays selected, open the Appearance panel (Window > Appearance) and add a second fill using the Add New Fill button (pointed by the little, blue arrow in the following image). Select this new fill, set its color at R=189 G=75 B=37 and go to Effect > Convert to Shape > Rectangle. Enter the properties shown in the following image and click OK. Return to the Appearance panel and add a third fill for your “ticket” shape using that same Add New Fill button. Select this new fill, drag it in the bottom of the Appearance panel, set the color at R=189 G=75 B=37, lower its Opacity to 15% and go to Effect > Path > Offset Path. Enter a 2px Offset and click OK. Keep focusing on the Appearance panel, make sure that your “ticket” shape is still selected and add a fourth fill. Drag it in the bottom of the Appearance panel, set the color at R=189 G=75 B=37, lower its Opacity to 5% and go to Effect > Path > Offset Path. Enter a 5px Offset, click OK and go to Effect > Blur > Gaussian Blur. Enter a 3px radius and click OK.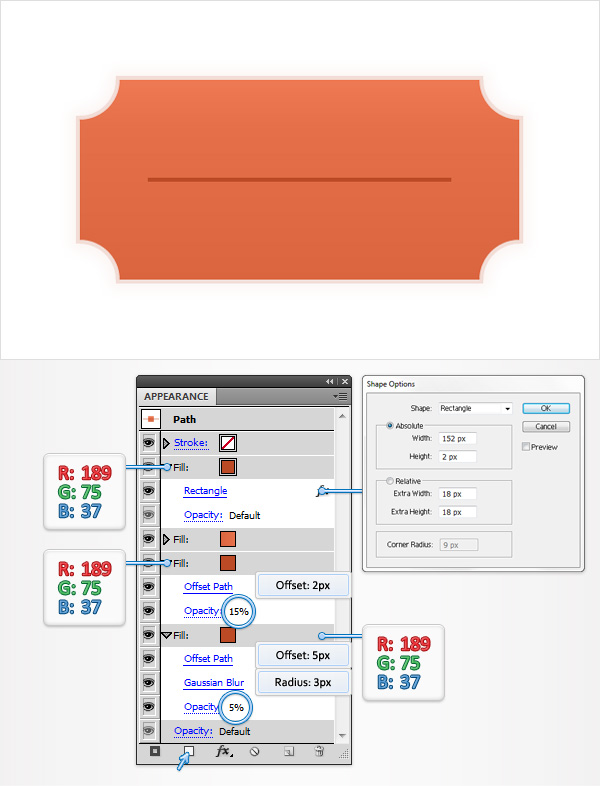
Step 6
Make sure that your “ticket” shape is still selected, focus on the Appearance panel and add a 3pt stroke. Select it, set the color R=189 G=75 B=37, align it to inside and go to Effect > Path > Offset Path. Enter a -10px Offset and click OK. Keep focusing on the Appearance panel and add a second stroke for your “ticket” shape using the Add New Stroke button (pointed byt the little blue arrow in the following image). Select it, set the color R=189 G=75 B=37, make it 1pt wide, align it to inside and go to Effect > Path > Offset Path. Enter a -15px Offset and click OK.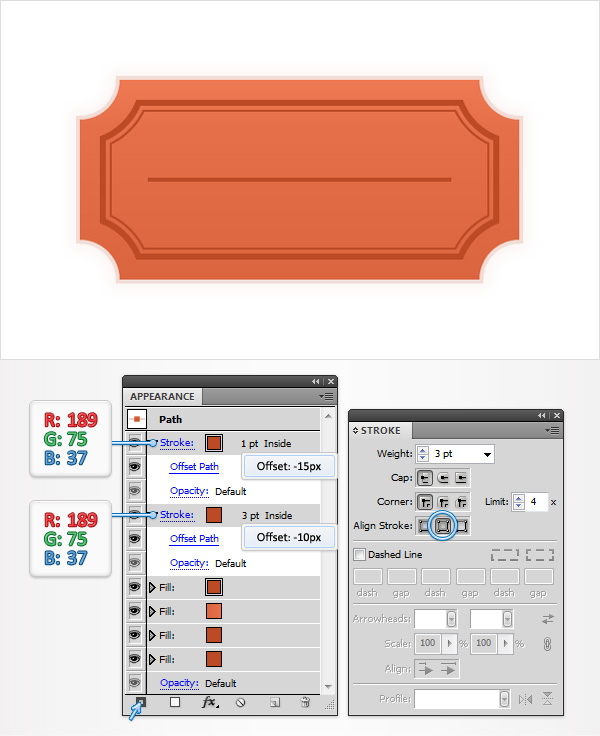
Step 7
Make sure that your “ticket” shape is still selected and focus on the Appearance panel. Add a third stroke, make it 2pt wide, align it to inside and set the color at R=255 G=149 B=112. Keep focusing on the Appearance panel and add a fourth stroke for your “ticket” shape. Make it 1pt wide, align it to inside and set the color at R=189 G=75 B=37.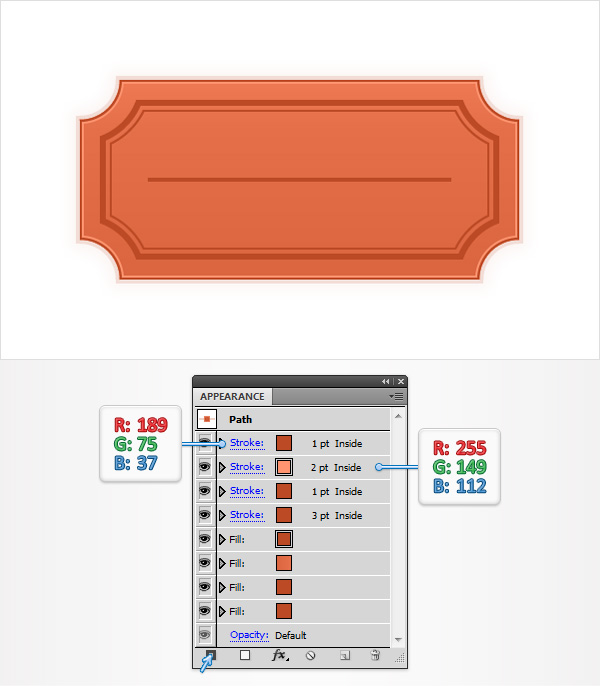
Step 8
Using the Type Tool (T), add the little pieces of text that you need. Set its color at R=189 G=75 B=37 then add the Drop Shadow effect (Effect > Stylize > Drop Shadow) shown in the following image.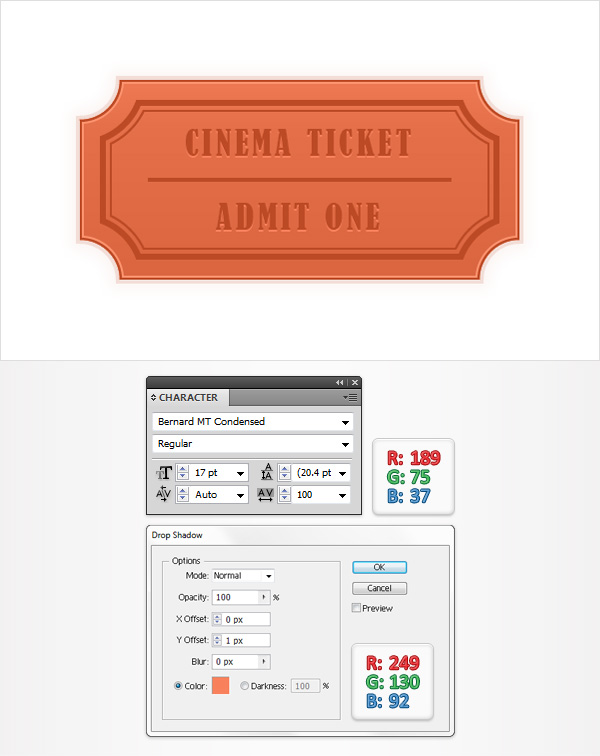
Step 9
Select those pieces of text along with the “ticket” shape and group them (CTRL + G). Select this new group and simply add the two Transform effects shown in the following image.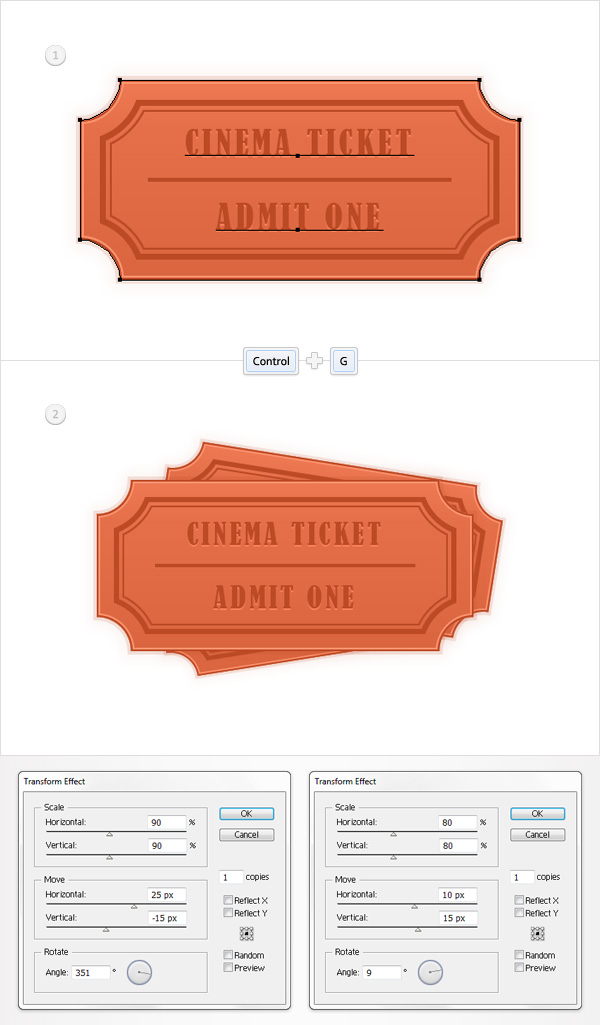
And We’re Done!
I hope you’ve enjoyed this tutorial and can apply these techniques in your future projects.
No comments:
Post a Comment